Step 1:
Ensure that python has been installed on your computer.
Step 2:
Once you have successfully installed python on your computer, you need to create a virtual environment.
Step 3:
Next, we will create our first Django project and run it and connect it to our local development server.
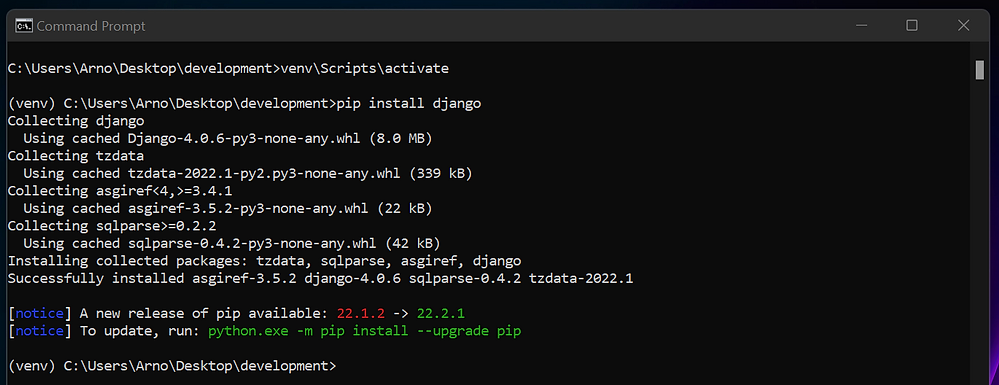
Step 3.1:
Make sure that you activate your virtual environment as follows:

Step 3.2:
Next, we need to install Django via the pip command:

Step 3.3:
Next, we need to start a new Django project. You can give it any name that you want. In this case, I'm calling it - "myproject1".
Step 3.4:
Now you need to cd into your Django project.

Step 3.5:
We want to now test our development server, so we must type in the following command:
python manage.py runserver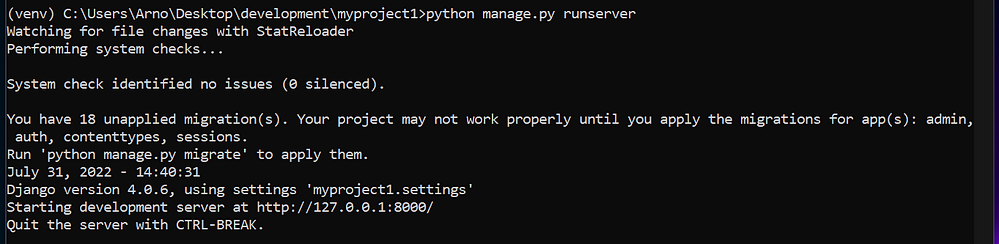
Step 3.6:
We can navigate to the URL below to see if our server is online.
http://127.0.0.1:8000/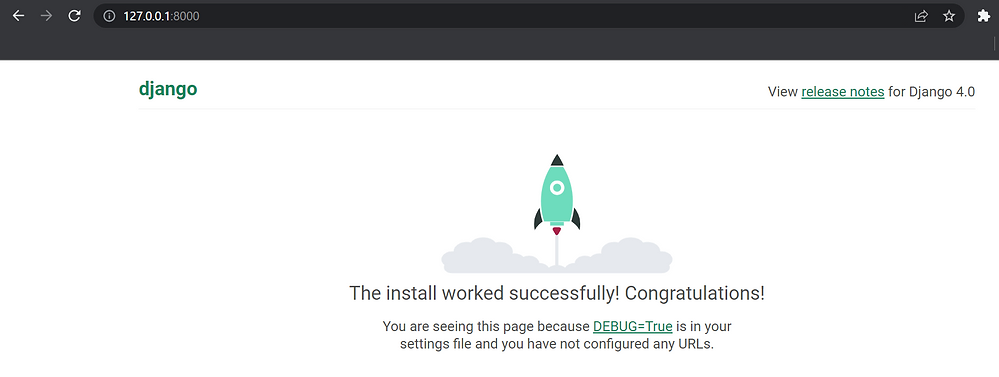
Python Django: Ultimate Beginners Course
Master Django development from scratch with theory and hands-on examples, building and deploying web applications.
🎓 Course available on Udemy now!